How to Install a Ceiling Fan Without Existing Wiring?
You want a ceiling fan in your room, but there is no wiring in the ceiling. No junction box. No switch. Just a flat, blank ceiling staring back at you. Sound familiar? You are not alone.
Thousands of homeowners face this exact situation every year, and the good news is that you absolutely can install a ceiling fan without existing wiring. This project does not require a full home renovation. It does require the right plan, the right tools, and a clear understanding of safe electrical practices.
Whether you have attic access or not, there is a method that fits your home. This guide breaks the entire process into clear, actionable steps so you can move from a blank ceiling to a spinning fan with confidence. Keep reading to learn every method, every tool, and every safety tip you need.
Key Takeaways
- A ceiling fan can be installed in any room even if there is no existing wiring, junction box, or light fixture. You will need to create a new opening, mount a fan rated electrical box, and run a new electrical cable to a power source.
- Three main methods exist for this project. You can work from the attic above, use an expandable brace from the room below, or install surface raceway for minimal ceiling cuts. Each method works well in different situations.
- A fan rated electrical box is required by code. A standard plastic light fixture box cannot safely support the spinning weight of a ceiling fan. Always use a box that is listed and tested for ceiling fan support, typically rated for 50 to 70 pounds.
- You can skip running wire to a wall switch by using a ceiling fan with a built in remote receiver. This option reduces the amount of cable you need to fish through walls and ceilings, saving significant time and effort.
- Safety is the top priority in this project. Always turn off power at the breaker panel and verify it is off with a non contact voltage tester before doing any work. If you are not comfortable with electrical wiring, hire a licensed electrician to handle the wiring portion.
- Permits may be required in your area for new electrical work. Check with your local building department before starting. A quick permit protects you and ensures the work meets local electrical codes.
Why You Might Need a Ceiling Fan Without Existing Wiring
Many older homes were built without ceiling light fixtures in every room. Bedrooms, for example, often rely on switched wall outlets instead of overhead fixtures. This means there is no electrical box in the ceiling at all.
Newer homes can have this issue too. Bonus rooms, converted garages, and finished basements often lack ceiling wiring. Adding a ceiling fan to these spaces improves air circulation, reduces air conditioning costs, and increases overall comfort.
The U.S. Department of Energy notes that ceiling fans allow you to raise your thermostat by about 4 degrees Fahrenheit while maintaining the same comfort level. That translates to real savings on your electricity bill during warm months.
Understanding the Three Main Installation Methods
There are three popular approaches for installing a ceiling fan where no wiring exists. Each method has clear advantages depending on your home’s structure and your skill level.
Method 1 involves working from the attic above. You install a fan brace between joists and run new cable from above. This is the most straightforward approach if you have attic access.
Method 2 uses an expandable brace inserted through a hole cut from the room below. This works well for second floor rooms or spaces with no attic access. The brace twists into position and locks between the ceiling joists.
Method 3 relies on surface raceway, also called Wiremold, to route wiring along the ceiling and wall surfaces. This is ideal for concrete ceilings, plaster ceilings, or any situation where fishing cable through walls is impractical.
Pros of Method 1: Easiest cable routing, strongest connection to framing, minimal guesswork.
Cons of Method 1: Requires attic access and working in a hot, cramped attic space.
Pros of Method 2: No attic needed, only one hole to cut, canopy covers the opening.
Cons of Method 2: Fishing cable through finished walls takes patience and skill.
Pros of Method 3: Minimal drywall damage, works on any ceiling type, accessible wiring.
Cons of Method 3: Raceway is visible on the surface, which may not suit every aesthetic preference.
Choosing the Right Location for Your Ceiling Fan
Location matters more than most people realize. The center of the room is the best spot because it provides the most even air distribution. Use a tape measure to find the center point of your ceiling.
Fan blades should be at least 18 inches from the nearest wall. The bottom of the fan blades should hang at least 7 feet above the floor for safety and clearance. Rooms with ceilings higher than 9 feet may need a downrod to bring the fan closer to the living space.
Before you cut anything, use a stud finder to locate the ceiling joists. The fan brace will attach to these joists, so you need to know exactly where they are. Mark their locations with a pencil. Also check for any plumbing pipes, HVAC ducts, or other obstructions that may be hiding above the drywall.
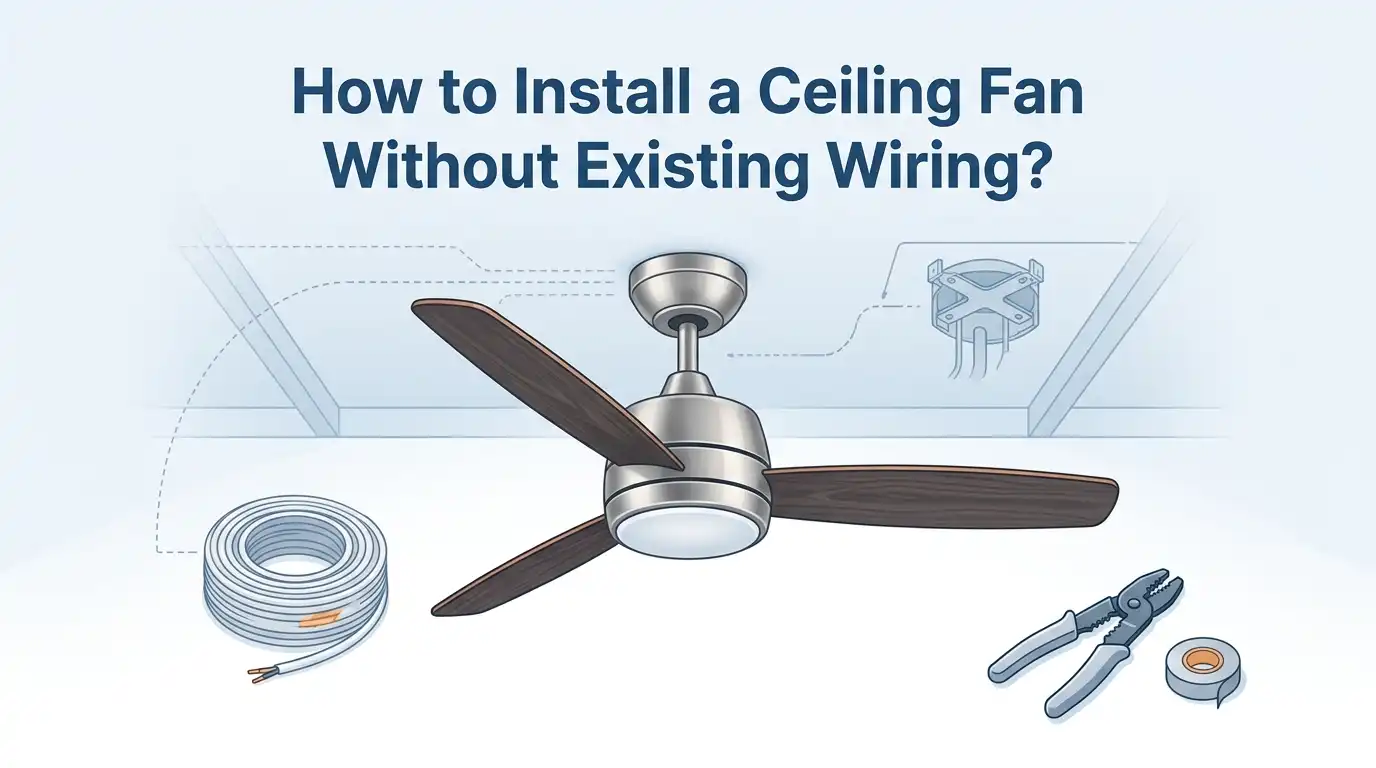
Tools and Materials You Will Need
Gather all your tools and materials before you start the project. Having everything within reach makes the job safer and faster. You do not want to be climbing up and down a ladder searching for a missing tool.
Essential tools include: a stud finder, a non contact voltage tester, a drywall saw or hole saw, a drill with bits, a fish tape or fish sticks, wire strippers, pliers, a screwdriver set, and a stable ladder.
Materials you will need: a fan rated electrical box with brace kit, NM B cable in 14/2 gauge (for a 15 amp circuit) or 12/2 gauge (for a 20 amp circuit), wire nuts, electrical tape, cable staples, a new single gang or double gang switch box, and the ceiling fan itself with all included hardware.
If you plan to control the fan and light separately from a wall switch, you will need 14/3 cable instead of 14/2. The extra conductor allows independent switching of the fan motor and the light kit.
How to Install a Fan Rated Electrical Box
This step is the foundation of your entire installation. A fan rated box is not optional. The National Electrical Code requires that ceiling fan boxes be listed and rated for the dynamic load of a spinning fan. Standard light fixture boxes can fail under this load, creating a serious safety hazard.
If you have attic access, place a fan support brace between the two nearest joists directly above your chosen location. Secure it with screws or the included teeth that grip into the wood. Then attach the metal fan rated box to the center of the brace.
If you have no attic access, cut a circular opening in the ceiling using the template included with your expandable brace kit. Insert the brace through the hole and twist the bar until both ends grip firmly into the joists on either side. Tighten the locking mechanism. Then slide the fan rated box onto the brace and secure it.
Make sure the box sits flush with the ceiling surface. It should feel completely solid with no movement when you push or pull on it.
Running New Electrical Wiring to the Fan Location
This is the most technical part of the project. You are creating a new electrical circuit path from an existing power source to your new ceiling fan location. Take your time and follow every safety step carefully.
Turn off the breaker that controls the circuit you plan to tap into. Use a non contact voltage tester to confirm the power is off. Then identify your power source. This could be a nearby wall outlet, an existing light fixture in an adjacent room, or a junction box in the attic.
Use a fish tape to route the NM B cable from the power source up through the wall cavity and across the ceiling joists to the new fan box. If you are working from the attic, this is much easier because you can simply lay the cable across the joists and staple it in place.
For walls without attic access, you may need to cut small access holes at the top of the wall plate to feed the cable into the ceiling space. These holes can be patched later with drywall compound. Connect the cable to the fan box using a cable clamp so the wire is secure and protected at the entry point.
Wiring the Ceiling Fan and Wall Switch
Once the cable is in place, the wiring connections are straightforward. Always match wire colors and follow the wiring diagram included with your specific ceiling fan model.
At the fan box, connect the black (hot) wire from your cable to the black wire on the fan. Connect the white (neutral) wire to the white wire on the fan. Connect the green or bare copper (ground) wire to the green ground wire on the fan and to the grounding screw on the box.
At the wall switch box, connect the incoming power wire to the switch and the outgoing wire to the fan. If you are using 14/3 cable for separate fan and light control, install a double switch. The black wire controls the fan motor, and the red wire controls the light kit.
Use wire nuts to secure every connection. Wrap each wire nut with a small piece of electrical tape for added security. Loose connections are one of the most common causes of electrical problems in ceiling fan installations.
The Remote Control Alternative: Skip the Wall Switch
If fishing cable through walls sounds like too much work, a remote control ceiling fan offers a simpler solution. Many modern ceiling fans include a built in wireless receiver inside the fan canopy.
With this setup, you only need to run power cable from a source to the fan box. You do not need to install a wall switch at all. The remote control handles fan speed, light dimming, and the on/off function wirelessly.
Pros: Dramatically reduces the amount of cable you need to run. Eliminates the need to cut into walls for a switch box. Saves several hours of labor.
Cons: Remote controls can be lost or need battery replacements. Some homeowners prefer the reliability and familiarity of a wall switch. If the receiver fails, you lose control of the fan until it is replaced.
This option is especially popular for rooms where running a new cable to the wall is extremely difficult, such as rooms with concrete walls or finished surfaces that are hard to repair.
Mounting the Ceiling Fan to the Box
With the wiring complete, the physical installation begins. Follow the manufacturer’s instructions that came with your specific fan model because mounting brackets vary between brands.
Start by attaching the mounting bracket to the fan rated electrical box using the screws provided. This bracket is what holds the entire fan. Make sure it is tight and level.
Next, lift the fan motor assembly and hang it on the mounting bracket. Most fans use a ball and socket design that allows the motor to hang while you connect the wires. This gives you both hands free for wiring.
After connecting all wires and tucking them neatly into the box, push the canopy up against the ceiling and secure it with the provided screws. Then attach the fan blades one at a time. Use a torque wrench or firm hand pressure to tighten blade screws evenly. Uneven tightening can cause wobbling.
Testing and Balancing Your New Ceiling Fan
Do not skip this step. A properly balanced fan runs quietly, lasts longer, and does not loosen its mounting over time.
Turn the breaker back on. Flip the wall switch or press the remote control button. The fan should start spinning smoothly. Run it on each speed setting for at least 30 seconds. Listen for grinding, clicking, or rubbing sounds. These indicate that something is misaligned or a screw is not fully tightened.
If the fan wobbles, use a blade balancing kit. Most fans include one in the box. Place the balancing clip on one blade at a time and run the fan on medium speed. When you find the blade that reduces the wobble, attach the adhesive weight to the top center of that blade.
Check all wire connections one more time after the fan has run for a few minutes. Vibration can sometimes loosen wire nuts during the first run. A quick inspection now prevents problems later.
Safety Tips and Code Requirements You Should Know
Electrical work is serious. These safety rules protect you, your family, and your home.
Always turn off the breaker before starting any electrical work. Use a non contact voltage tester to double check that wires are dead. Never assume a circuit is off based on the breaker label alone. Labels are often inaccurate.
The National Electrical Code requires that ceiling fan boxes be listed for fan support. Using an improper box is a code violation and a safety hazard. Ceiling fans can weigh 15 to 50 pounds and create significant dynamic force while spinning.
Check your local permit requirements. Many municipalities require a permit for new electrical circuits. The permit process usually includes an inspection that verifies the work meets code. This small step gives you peace of mind that your installation is safe and legal.
Never work on a wet ceiling. If you see water stains or moisture above, address the source before installing any electrical components. Water and electricity are a dangerous combination.
When to Hire a Professional Electrician
Some situations call for professional help. There is no shame in calling a licensed electrician when the project exceeds your comfort level.
Hire a professional if your home has aluminum wiring, knob and tube wiring, or any outdated electrical system. These require specialized knowledge and techniques. Also consider hiring help if your breaker panel is full and a new circuit is needed, because adding a breaker involves working inside the main panel.
If you are comfortable doing the physical mounting but not the wiring, a great compromise exists. Install the fan brace and box yourself, then hire an electrician to run the cable and make connections. This approach saves you money on labor while keeping the electrical work in expert hands.
Professional electrician rates for ceiling fan installation with new wiring typically range from $200 to $500, depending on your location and the difficulty of the cable run. This cost includes running cable, installing a switch, and connecting the fan.
Frequently Asked Questions
Can I install a ceiling fan on a plastic electrical box?
No. Plastic electrical boxes are designed for light fixtures only. Ceiling fans require a fan rated metal box that is tested and listed to support the spinning load. Using a plastic box creates a serious risk of the fan falling from the ceiling.
How much does it cost to install a ceiling fan without existing wiring?
If you do the work yourself, materials typically cost between $100 and $250. This includes the fan, a fan rated box with brace, cable, a switch, and basic supplies. Hiring an electrician for the complete job usually costs between $200 and $500 on top of the fan price.
Can I tap into a nearby wall outlet for power?
Yes, in many cases you can. The outlet must be on a circuit with enough capacity to handle the additional load of a ceiling fan. Most ceiling fans draw between 50 and 100 watts. Check the circuit’s total load before adding the fan to avoid overloading the breaker.
Do I need a permit to install a ceiling fan?
This depends on your local building codes. Many jurisdictions require a permit for new electrical wiring. Installing a fan on an existing circuit with an existing box may not need a permit, but adding a new circuit or new wiring usually does. Contact your local building department to confirm.
What if my ceiling is made of concrete or plaster?
For concrete ceilings, surface raceway is the most practical solution. Mount a fan rated box directly to the concrete using masonry anchors and route wiring through the raceway channel. For plaster ceilings, an expandable brace can work, but cut carefully to avoid cracking the surrounding plaster. A rotary tool with a cutting attachment gives cleaner results than a standard drywall saw.
Is it safe to install a ceiling fan by myself?
The mechanical mounting is within reach of most handy homeowners. The electrical wiring portion carries real risk if you are unfamiliar with electrical systems. If you have any doubt about your ability to safely work with electrical wiring, hire a licensed electrician for that portion of the job. Your safety is always more important than saving money on labor costs.